contact us

Use the form on the right to contact us.


Naperville, IL 60565
USA

630-639-7372

iPhone-XS-photo.jpg

Blog

A Quick Trick to Turn Your iPhone into a Magnifying Glass

Paul Whitlock

Magnifier-photo.jpg

A Quick Trick to Turn Your iPhone into a Magnifying Glass

It’s maddening to want to read a serial number or other bit of fine print that you can barely see. But fret no longer—your iPhone or iPad makes a fabulous magnifying glass! Assuming Magnifier is enabled in Settings > General > Accessibility > Magnifier, you can bring it up by pressing the Home button (for Touch ID devices) or side button (for Face ID devices) three times quickly. If that’s too hard to remember, you can also add a Magnifier button to Control Center in Settings > Control Center > Customize Controls. The special camera viewfinder is zoomed automatically, but you can change the zoom level with the slider, tap the flash icon to turn on the LED light (if available on your device), enable a filter to change the color or contrast, or lock the focus by tapping the lock icon. You can also freeze the image by tapping the white shutter button, which is great for grabbing a picture of a tiny serial number on the back of some device (tap that button again to resume using Magnifier). To leave Magnifier, press the Home button or swipe up from the bottom of the screen.

Magnifier-serial-number.jpg

Collaborate with Colleagues in Google Docs

Paul Whitlock

Google-Docs-collaboration-photo.jpg

Collaborate with Colleagues in Google Docs

Collaboration is what all the cool kids—well, all the competitive businesses—are doing these days because it’s efficient and effective. See “Stop Mailing Files Around and Use Collaborative Apps” and for users of Apple’s iWork, “Collaborate with Colleagues in Pages, Numbers, and Keynote.” Today we’re going to look at collaborating using Google’s Web-based productivity suite, Google Docs, which businesses can use for free or as part of a G Suitesubscription.

The Google Docs suite competes with Apple’s iWork and Microsoft’s Office 365, providing Google Docsfor word processing, Google Sheetsfor spreadsheet work, and Google Slidesfor presentations. You can manage all your files in Google Drive. Although all are Web-based and work best on a Mac or other desktop computer, Google also makes iOS apps that let you work—a bit less flexibly—on an iPad or iPhone.

You’ll need a free Google account to create new documents, and for full-fledged collaboration, your colleagues will need Google accounts too. You can share documents with people who lack Google accounts or don’t want to sign in, but their comments and changes will be anonymous.

Invite Collaborators

Once your document is ready to share, you can invite collaborators by clicking the large Share button in the upper-right corner of the window. 

Flexible permissions let you share with specific people, and for each person, set whether they can edit, comment on, or just view the document (below left). You can also add a note that will be sent with the invitation.

Share-dialogs.png

If that’s too specific—you’re sharing with a large group, for instance—click Get Shareable Link to turn on link sharing (above right). Then you can set the permissions for the link by clicking the down-pointing arrow next to “Anyone with the link can…” This works well for things like self-service signup spreadsheets. Copy the link and send it however you like, such as via Messages or to a mailing list.

If you add people over time, you can see who has access by clicking Advanced. That view also provides more owner controls, including the option to prevent commenters and viewers from downloading, printing, or copying.

When you’re done, click Send or Done.

Accept an Invitation

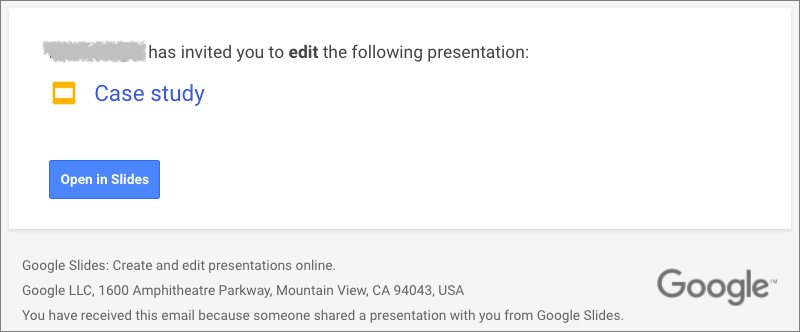
People you invite receive an email invitation and click the Open In button to start working on the document. With link sharing, all the recipient has to do is click the link.

Accept-Google-invite.png

The main gotcha is that recipients must sign in to their Google accounts if sharing has been restricted to specific people. A less common problem can occur when you send an invitation to someone at an email address that doesn’t match their Google account, which prevents them from collaborating. They can then request that you share the document with their Google account; click the Open Sharing Settings button in the request email to grant access. 

Request-access-email.png

Add and Change Data

Apart from the permissions that restrict collaborators to commenting or viewing, there are no limitations on what people can do in a shared document—all editors are equal, and Google Docs works the same whether a document has one person using it or ten.

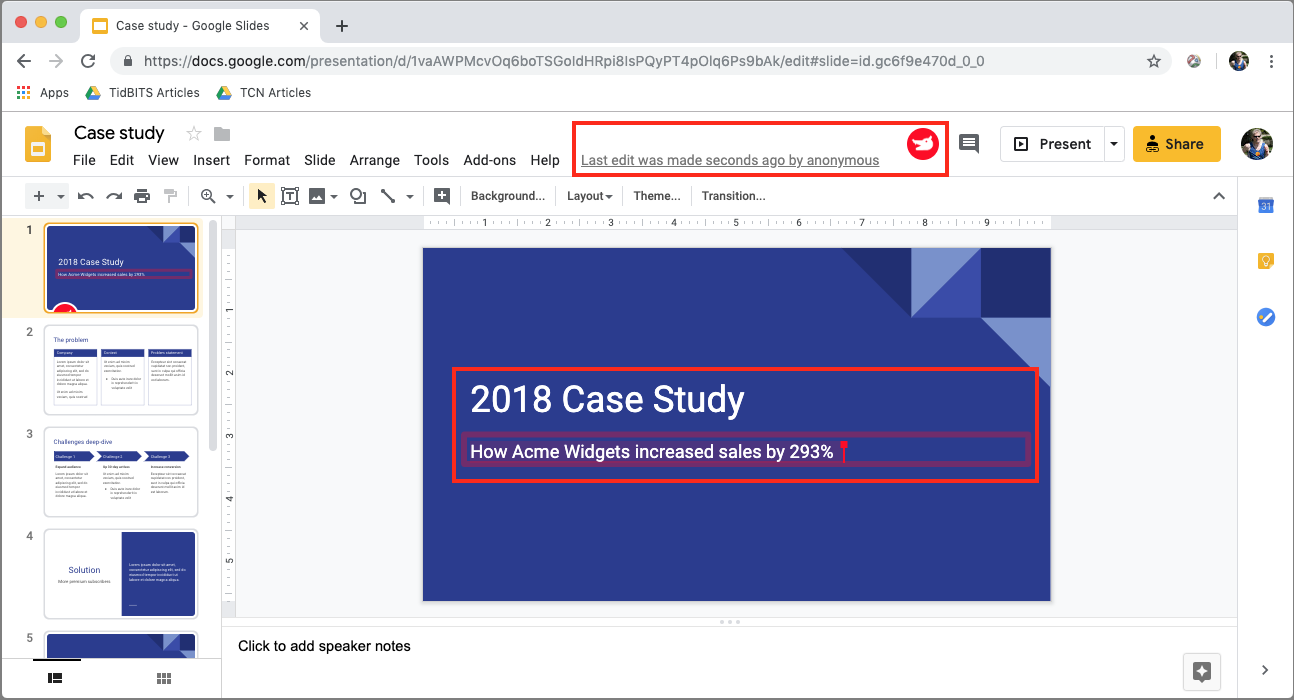
You can see who is in the document by the little avatar icons in the menu bar. It also tells you when the last edit was, and Google Docs always shows where other users are working with a color-coded cursor and marks when other users have selected content in the document with a colored highlight box.

Using-Google-Slides.png

Add Comments

The beauty of comments in a collaborative scenario is that discussions can occur in context. To add a comment, select some text and choose Insert > Comment. Comments show up in the right-hand sidebar in Google Docs and Google Slides; in Google Sheets, the cell containing a comment gets a little yellow triangle in the corner, and the comment appears when you click the cell.

Google-Docs-comments.png
Google-Docs-comment-stream.png

View Versions and Suggested Changes

The main way to see who has done what in a document is by choosing File > Version History > See Version History. That displays a right-hand sidebar showing dates when the file was changed; click an entry to see the changes in the main pane. Arrows above the main pane let you highlight each change in turn. If you want to revert to the selected version (which will delete all subsequent changes!), click Restore This Version.

Version-history.png

For Google Sheets and Google Slides, version history is all that’s available, which can be frustrating because when you’re reviewing edits in version history, you can’t make changes. As a workaround, open a second browser window so you can review changes in one window and make edits in another.

Google Docs (the word processor, in this case) offers another choice: Suggesting mode, which works more like Track Changes in Page or Word. Switch into it by clicking the pencil icon in the upper-right corner and choosing Suggesting. From then on, all edits are non-destructive and are color-coded by the person who makes them. They’re coupled with boxes in the right-hand sidebar that detail the change, provide ✔ and X icons for accepting or rejecting the change, and offer a Reply field that enables discussions of each change—a brilliant feature.

Suggesting-mode.png

If you want to be guided through all the suggested edits, or accept or reject changes all at once, rather than handling them one at a time in the right-hand sidebar, choose Tools > Review Suggested Changes.

Review-Suggested-Edits.png

When you’re done collaborating on a document, you can click the Share button and remove people or turn off link sharing. That immediately prevents others from making more changes.

When choosing a collaboration platform, you’ll generally pick what your colleagues use, whether that’s Google Docs, iWork, or Office 365. However, if you’re sharing with people whose platform and app details you don’t know, Google Docs is the best choice—Google accounts are common and the Google Docs apps work equally well on all computers. Plus, since Google Docs was built from the ground up for collaboration, it’s a mature solution that’s quick, easy, and effective.


Social Media: For quick, easy, and effective collaboration regardless of what apps or platforms people use, give Google Docs, Sheets, and Slides a try. We’ll help you get started here

What’s with All These Dialogs Saying, “SomeApp is not optimized for your Mac”?

Paul Whitlock

64-bit-photo.png

What’s with All These Dialogs Saying, “SomeApp is not optimized for your Mac”?

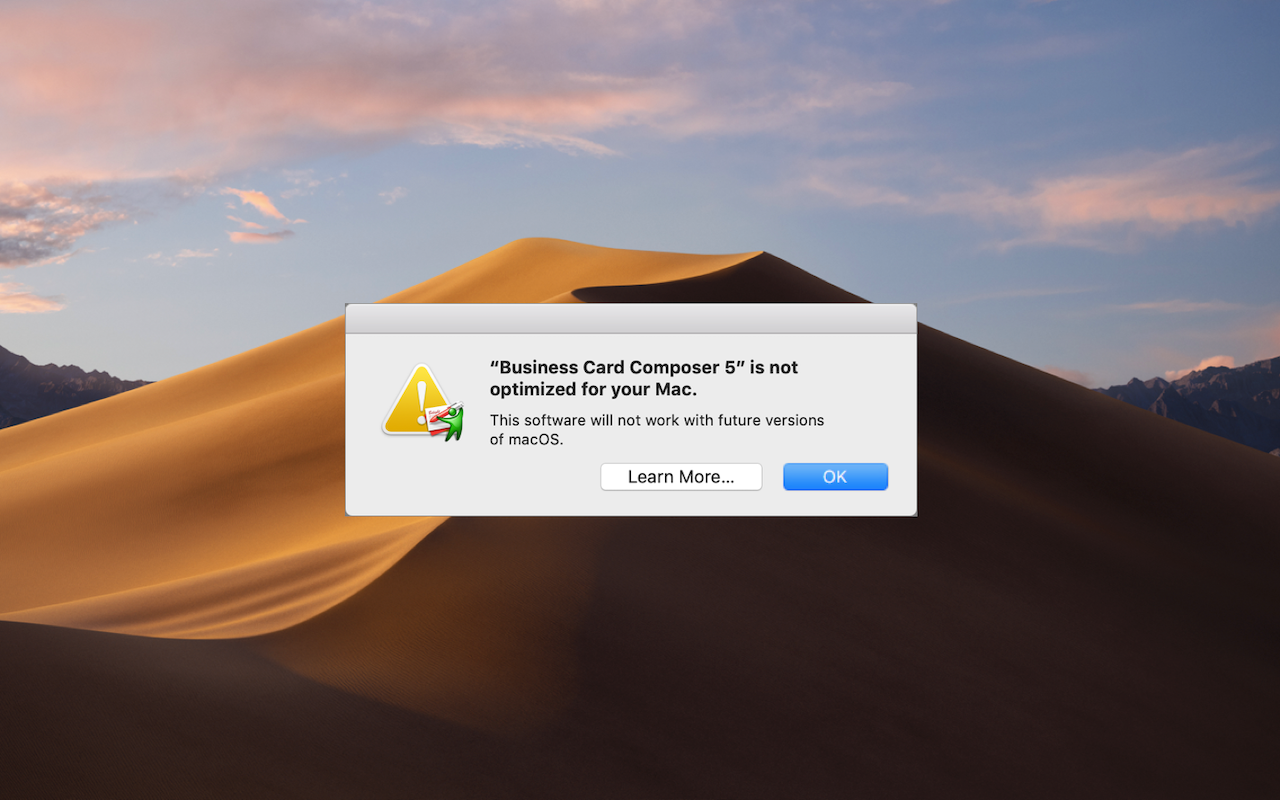
If you’re running macOS 10.13.4 High Sierra or macOS 10.14 Mojave, you may have seen a dialog that says an app isn’t optimized for your Mac. The message differs slightly between High Sierra and Mojave, with the High Sierra version telling you the developer needs to update the app to improve compatibility whereas Mojave saying bluntly that the app won’t work with future versions of macOS.

64-bit-app-Levelator-warning.png
64-bit-app-BCC-warning.png

What’s going on here, what should you do, and when should you do it?

What’s Going On: 32-bit and 64-bit Apps

Over a decade ago, Apple started to transition all the chips used in Macs, along with macOS itself, from a 32-bit architecture to a 64-bit architecture. Without getting into technical details, 64-bit systems and apps can access dramatically more memory and enjoy significantly faster performance.

Apple knew it would take years before most people were running 64-bit hardware and 64-bit-savvy versions of macOS, so it allowed macOS to continue running older 32-bit apps. However, maintaining that backward compatibility has a cost, in terms of both performance and testing, so at its Worldwide Developer Conference in 2017, Apple warned developers that High Sierra would be the last version of macOS to support 32-bit apps “without compromise.” At the next WWDC in June 2018, Apple announced that macOS 10.14 Mojave would be the last version of macOS to run 32-bit apps.

Happily, the only “compromise” for 32-bit apps in Mojave is the warning dialog, which appears every 30 days when you launch an older app. But the writing is on the wall: 32-bits apps will cease working in macOS 10.15.

How Do You Identify 32-bit Apps?

Apple provides a tool to help you find 32-bit apps. Follow these steps:

From the Apple menu, choose About This Mac and then click the System Report button.

64-bit-About-This-Mac.png

In the System Information utility that opens, scroll down to Software in the sidebar and select Applications. It may take a few minutes to build the list of every app on all mounted drives.

When it finishes, click the 64-bit column header (No means 32-bit; Yes means 64-bit) to sort the list, and select an app to see its details in the bottom pane.

64-bit-app-System-Information-apps.png

This technique works in both High Sierra and Mojave, but in Mojave, System Information includes a better-formatted section, called Legacy Software, that also provides a list of 32-bit apps. However, this list may be smaller because it includes only those apps that you’ve launched. Since it’s likely that you open old 32-bit apps only occasionally, you can’t trust the Legacy Software list to be complete.

64-bit-app-System-Information-Legacy-Software.png

If you find System Information’s Applications list overwhelming, check out the free 32-bitCheckutility from Howard Oakley. It performs exactly the same task but lets you focus on a particular folder and save the results to a text file for later reference.

64-bit-app-32-bitCheck.png

What’s Your Next Step?

Once you know which apps won’t work in macOS 10.15, you can ponder your options. Luckily, you have some time. We expect Apple to release macOS 10.15 in September 2019, but you don’t need to upgrade right away—in fact, we recommend that you wait a few months after that to allow Apple time to fix bugs.

That said, we do encourage upgrading eventually, and if you buy a new Mac after September 2019, it will come with macOS 10.15. So you need to establish a plan—it’s better to know what you’re going to do than to be forced into action if you have to replace your Mac on short notice. For each 32-bit app on your Mac, you have three options:

●    Delete it:It’s not uncommon to have old apps that you haven’t used in years and won’t miss. There’s no need to waste drive space on them in macOS 10.15.

●    Upgrade it:Apps in active development will likely have a new version available. The main questions are how much the upgrade will cost and if there are compatibility issues associated with upgrading. You can upgrade at any time, although it’s likely worth waiting until you’re ready to move to macOS 10.15 to minimize costs. The apps that cause the most irritation here are things like the Adobe Creative Suite—Photoshop, Illustrator, and InDesign—that require switching to a monthly subscription. 

●    Replace it:If no upgrade is available, the cost of upgrading is too high, or upgrading comes with other negatives, it’s time to look for an alternative. This can take some time, so it’s worth starting soon to ensure that the replacement will provide the features you need before macOS 10.15 forces the decision.

Needless to say, if you’d like recommendations about how to proceed with any particular app or workflow, get in touch with us!


Social Media: Have you seen dialogs warning that an app isn’t optimized for your Mac? Here’s what’s going on, what you should do, and when you should do it: